Introduction to wick-making
My wick design is a variation on the normal cathedral wick. As with all cathedral wicks, two pieces of wicking tape are laid at 90° angles and folded over and back across each other. My design differs from most in the way it is held together: whereas most people use an eyelet bolt running through the middle, I use a looped piece of aircraft cable that is anchored at the bottom by a toggle, and at the top by an attachment ring and cable sleeve.
Tools
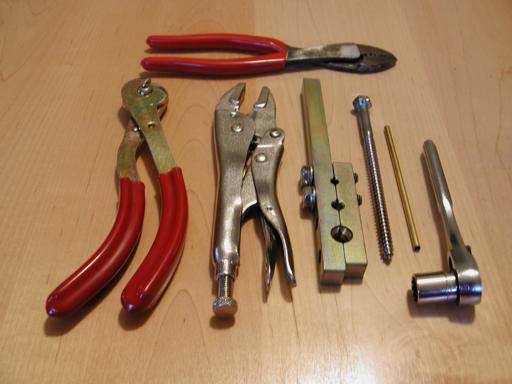
Shown here are the tools used in wick construction. Top: crimping tool Left to right: wirecutter, vise-grip, swage-it tool, big-ass sheetmetal screw, brass tube, socket wrench (sized to sheetmetal screw). Not shown: Plenty of sturdy rubber bands. You’ll need at least two per wick, plus some spares in case they snap.

Materials
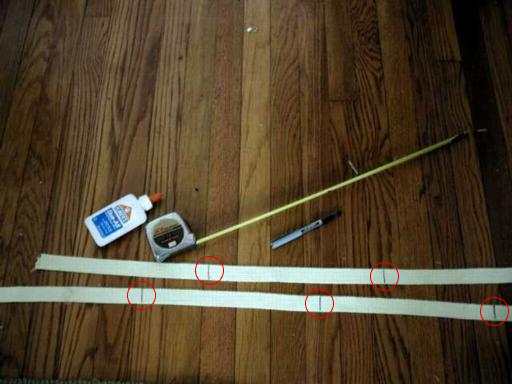
Shown here, top to bottom, are the materials for making a pair of wicks:
- Strips of wicking (4). I use 2″ x 24″ strips of 1/8″ thickness for my standard wicks
- Aircraft cable, 1/16″ diameter (2). Ideally, this will be cut to exactly the right length, so that when you finish off the wick, it barely reaches the top of the cable sleeve. In practice, this is hard to get exactly right.
- Washers, 1″ OD, 0.25″ ID (4).
- Cable sleeves (2). These must be sized to the aircraft cable.
- Nuts, 6-32 size (2). These will be used as toggles; size is not critical but they must be at least big enough so that they cannot slip through a washer hole.
- Welded steel rings (2). These will be your attachment rings. Size is not critical–the smaller the better as long as they are strong enough. You can substitute quick-links for these rings.
Prepare the wicking
Before you even get started, roll out your wicking, stretch it slightly, and precisely mark where your cut-lines will be. Then smear some plain white glue over each line, and let the glue dry before cutting. This will prevent the cut ends from unravelling.
Measuring out the correct length of wicking in advance is a little bit of a trick. Since you are folding the length of one piece across the width of the other, the width of your wicking plus a little extra serves as a useful dimensional module. With wicking that is 1/8″ thick, allow 0.4″ as your “little extra” for the foldover, so for 2″ wide wicking, 2.4″ is your module. This means that with two 24″ strips, you wind up with exactly 10 plies in your wick, which is what I consider a standard size. If you want something a little smaller, try 16.5″ strips to get 7 plies—this is what I consider a small size.

Step 1: layout
Begin by laying out your wicking at 90° angles, with the ends overlapping by the width of the wicking.
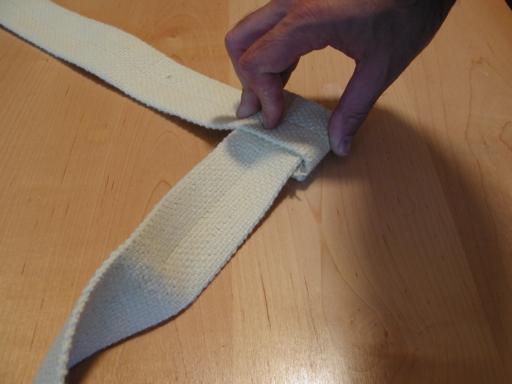
Step 2: begin folding
Fold these short overlaps over, and then start folding the long ends back and forth to interleave them with one another.
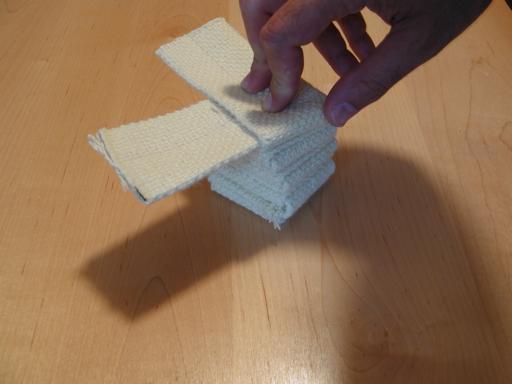
Step 3: finish folding
When you finish folding, there should be just enough left on each strip to tuck the ends all the way inside the previous layers. You may find the last fold is a little long or short depending on minor variations between mill runs (which get magnified when you fold them over 10 times). You can live with this or re-fold the bundle to move slack around.

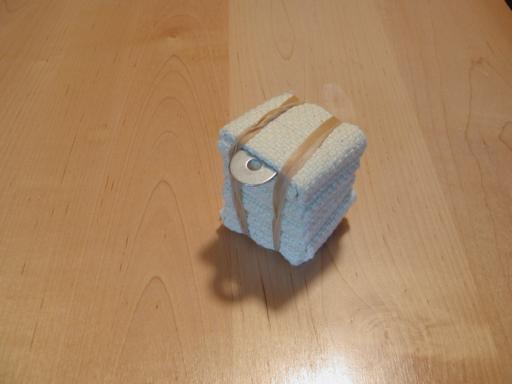
Step 4: Bundling
Hold the bundle together with a couple of rubber bands.
Step 5: Insert washer
To create a blind-rigged bottom, you must slide a washer between the bottom layer and the next. Make sure it is centered. If you aren’t creating a blind-rigged bottom, you can omit this step and slip the washer over the cable and on top of the toggle in step 8

Step 6: Drill pilot hole
Using your big-ass sheetmetal screw and socket wrench (or bare hands, if you’re really tough), carefully drive a pilot hole straight from the center of the top to the center of the bottom–so that the washer comes at the end of this process, not the beginning. You’ll need to squeeze the bundle with one hand as you drive the screw with the other.

Step 7: Back out screw
Lock the head of the screw in a vise-grip or vise. Hold one end of the brass tube to the tip of the screw, and carefully spin the wicking bundle off the screw, onto the tube.

Behold, the skewered bundle
Once you complete Step 7, the brass tube should run through the pilot hole, as shown here.

Step 8: insert cable and toggle
Slip the toggle-nut over the cable, and slip both ends of the cable into the the brass tube on the bottom side of the wick. If you are not making a blind-rigged bottom, slip a washer over the cable ends so that it rests on the toggle. You can substitute an attachment ring for the nut if you want to create a double-ended wick–these should be reserved for use only as double-wicks, not as single wicks.
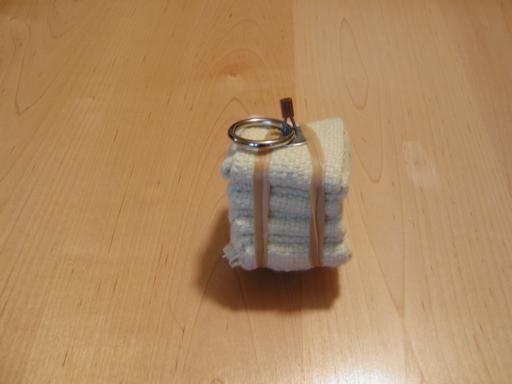
Step 9: Make up top
Slip the brass tube out the top of the bundle, bringing the cable ends with it so that they stick out the top. Lay a washer over the cable ends, then lay an attachment ring (or quick-link) between them, and slide a cable sleeve over them. Ideally, the cable will be just barely long enough to reach to the top of the cable sleeve with a little squeezing. If not, remove the cable sleeve and cut off the excess cable. Crimp the cable sleeve in place.

Step 10: Swage the cable sleeve
This step is optional–swaging tools are fairly exotic. Use the swaging tool to swage the cable sleeve. This results in a smooth, clean joint that is as strong as the cable. If you don’t have a swaging tool, use your crimping tool (or pliers) and squeeze down hard on the cable sleeve to create a secure joint. This will not be as strong or tidy as a swaged joint, but will be pretty strong.

Almost there
You’re almost finished, except for the bottom–the toggle is still sticking out.
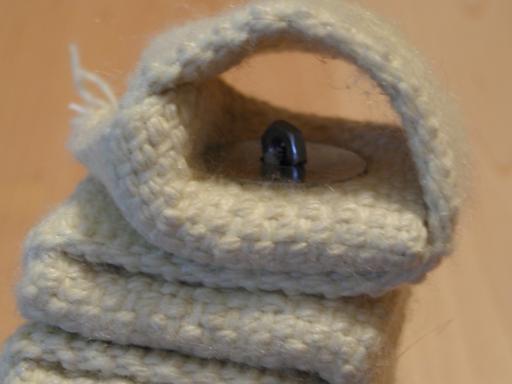
Step 11: Work the toggle inside
If you are not making a blind-rigged bottom, you’re done. If you are, you need to work the fibers of the wicking around and over the toggle. To fully finish the bottom, insert a 1″ wide scrap of wicking into the bottom opening, and seal it shut: either sew it with some unraveled kevlar thread, or (my method) glue the bottom with heat-resistant adhesive and compress the bundle with rubber bands while the adhesive sets.